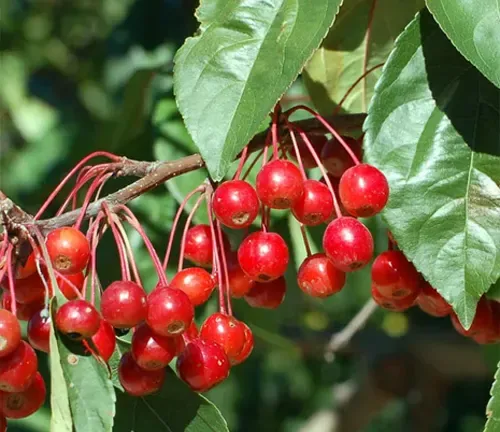
Crabapple Jelly

A few years ago our crabapple tree was languishing, as was a nearby tree that I had raided in the past. However, our newest neighbour on the street had two crabapples that were just groaning with the weight of all the fruit.
I decided that it would be a good time to introduce myself and also ask what they were going to do about all the crabapples — thinking, naively that they might intend to make jelly.
The response was “I really don’t know; they make such of a mess of the lawn and get caught up in the mower”. So my next question was whether they would mind if I picked the crabapples off the tree?
I got a quizzical look and was asked what I planned to do with them. Responding that I would make crabapple jelly, the look changed from puzzled to one of vague recollection. He and his wife seemed to remember either hearing about it or seeing it in some specialty store. They both doubted their crabapples were edible.
After a brief assurance that the fruit was in no way poisonous, I was asked how one went about making crabapple jelly so I explained the process (as outlined below). Both husband and wife shot each other very similar glances and expressed a clear “better you than us” comment followed by something to the effect that their lives were too busy and full to spend time making jelly. Despite their continued suspicion of the edibility and safety of their own fruits, I promised to give them a jar of the finished product.
Here is the process that was considered too involved:
Day One
- Pick the apples and gather into a large pot.
- Add water from garden hose and rinse apples, drain
- Do it again if the water looked murky
- Cut stems and leaves off the clean apples and return to pot
- Add water to just barely cover
- Place over high heat, bring to boil and reduce heat to simmer
- Simmer until the apples start to fall apart
- Drain into a sieve lined with several layers of cheesecloth or light unbleached cotton
- Place sieve with apples back over the same pot and let drip overnight
Day Two
- Get your jars and lids ready
- Sterilize jars in dishwasher (not the lids) or use HOT soapy water. Place clean and rinsed jars upside down on a clean cloth.
- Gently squeeze apples to release more liquid (if you squeeze too hard the liquid will get more and more cloudy)
- Measure the amount of liquid you have and then measure the same amount of white sugar (no need to go all natural here and muck about with honey – you really need bad-old white sugar to make this work)
- Pour liquid back in the same pot (you’ll notice that only one pot was used in this process – no need to recruit every pot, pan and utensil in the kitchen), add the sugar and bring to a boil. You can add commercial pectin at this point, but it’s really not necessary. Ditto for adding some lemon juice) Do keep in mind that your pot should be AT LEAST twice the size of the cold liquid and sugar because it will EXPAND in a big way. Stir, stir, stir constantly.
- Your liquid should gave a beautiful cranberry coloured tint and be quite clear at this point. Keep boiling and stirring until it starts to thicken. How long? Whatever… 10 minutes, more? It’s not an exact science.
- Turn off heat and keep stirring for another 5 minutes or so.
- Start ladling the hot liquid into your jars. Leave ½ “ headroom for expansion.
- Clean any spills or drips along jar top edges with a CLEAN paper towel or cloth.
- Screw on lids firmly but not man-wrenched tight
- Wash your trusty pot and fill with HOT water.
- Place jars in the HOT water and bring to a full boil. Water should be over the lids
- Boil for at least 45 minutes.
- Let cool in water and then remove jars to quiet spot (on top of folded towels to absorb heat). Now tighten the lids
- Leave everything alone and listen to the lids pop as they seal
Day Three
- Put your jars away and don't forget to gaze at and admire your toil
Total time of work involved : maybe an hour or two spread out over 2 days.
Would you like to read other posts? If so, please click the Home Page link below:

You, Dear Reader, are much needed and appreciated.
Everything written requires a reader to make it whole. The writer begins, then you, dear reader, take in the idea and its image, and so become the continuation of its breath. Please subscribe so that my words can breathe. Consider this my hand, reaching out to yours.
